Thursday 26 January 2012

I loves those niches to pieces

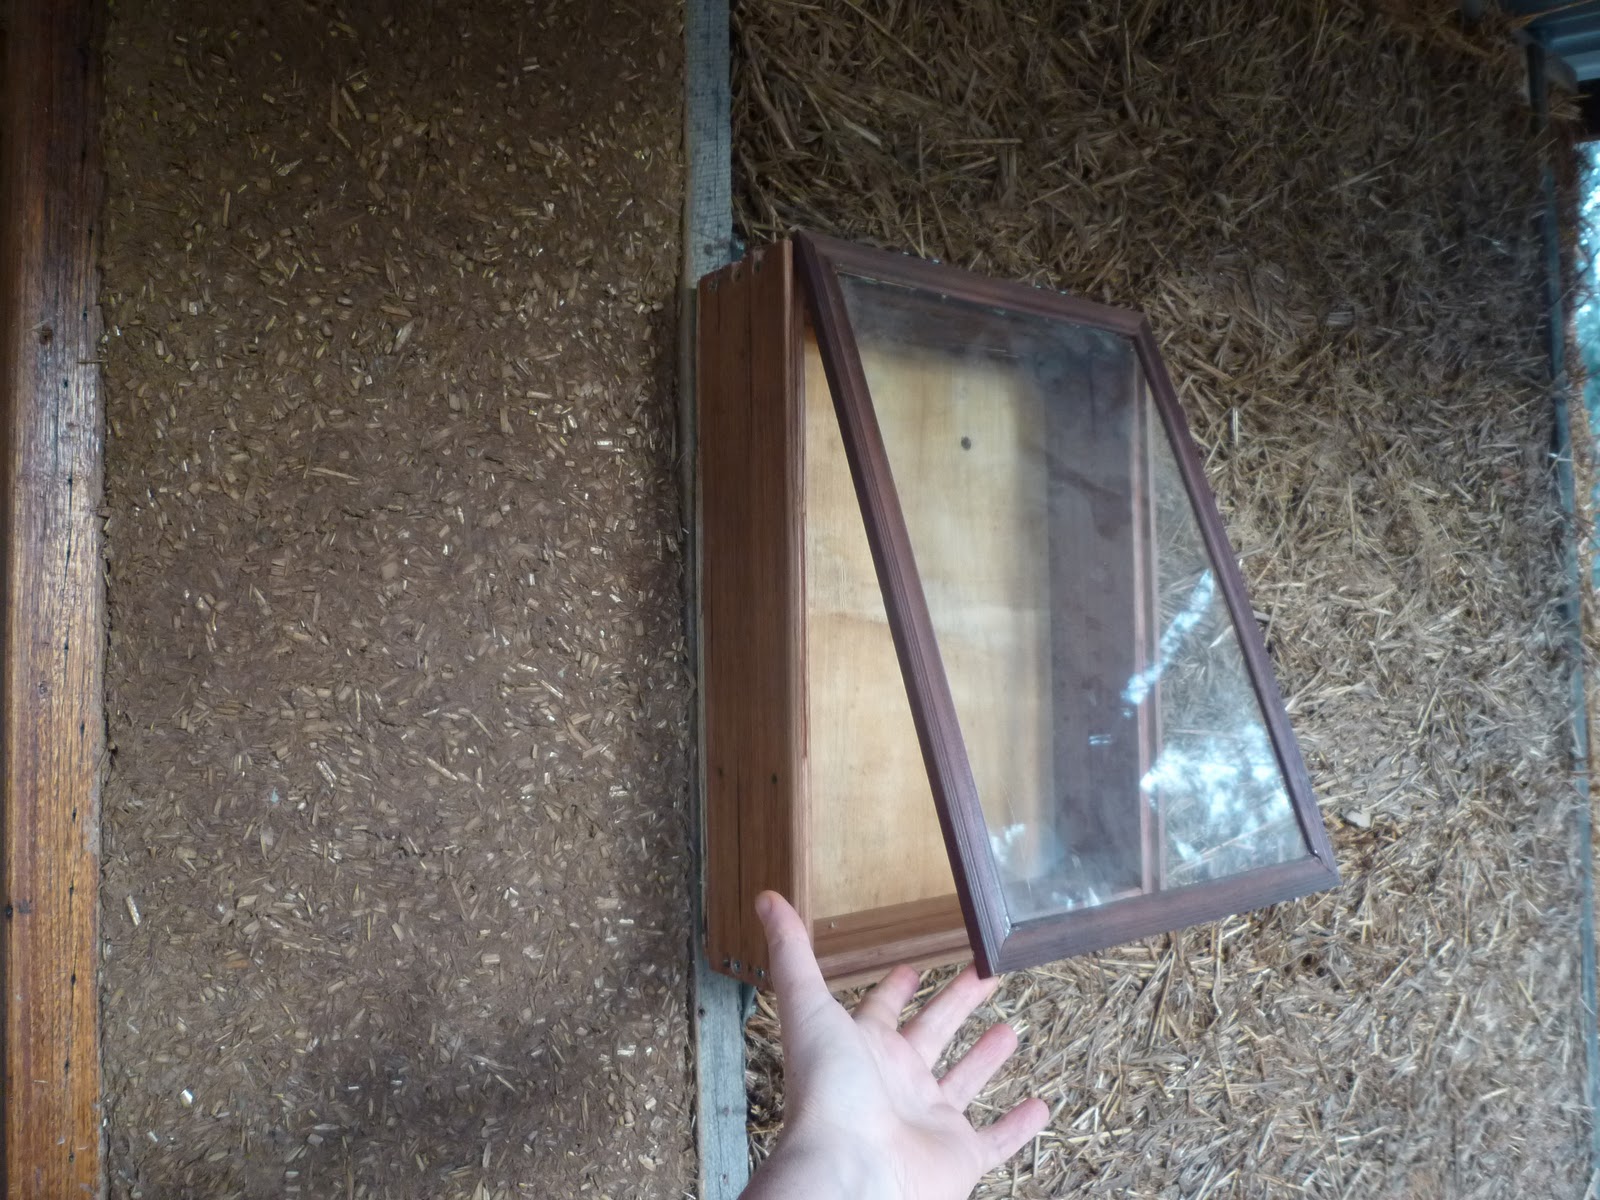
Window seat area with windows old and new and a niche - it's shaping up well, yes?
Working on the very shapely north wall and window seat means that every one of those little details that we've been planning for months or even years comes to life.

The latest bit of fun is the niches.  We planned two - one with shelves and one with just a ledge at the bottom.  The challenge was to create some niche-shaped formwork that could sit there while I made a wall around it, then removed later.  I'm not the world's greatest carpenter, so I sweated and worried and procrastinated.  Eventually, I did what comes naturally - improvised!


Wheely good formwork for niche with ledge

The wheelbarrow wheel exploded that day when all the infrastructure failed.  It turned out to be just the size and width I needed for the curved top.

On the last day of our summer holidays we mudded the first niche into place.  That day was a real slog and it was sad letting go of the summer hols, so pulling out the wheel at the end of the day and revealing the niche was a bit special.

Freshly minted niche - still wet, with bamboo in place
I buried lots of bamboo in the wall to hold the curve and support the structure.  I also used three or four strong pieces of bamboo as a lintel buried horizontally above the niche, to spread the weight of the full-thickness wall above the niche to the columns on either side.  But once the wall is dry and set, it takes its own weight nicely, so I snipped out some of the bamboo.

Partly dry, with some bamboo removed
The rest of the bamboo will stay buried in the wall and I'll render over it.  The key-hole shape is accidental, but I kind of like it.  Later on I'll decide whether to snip out a bit of straw to make the walls straight, or leave it like that.

Last weekend we finished the last full-height wall of the building (whoo!), which contains a matching niche with three shelves.

Wet wall: niche with three shelves all wrapped up, ready for the big reveal
The shelves are meant to look like they are just sitting in mud, but really they are attached to a strong framework buried in the wall.  The photo at the top of this page shows the niche in the wall, and the context.

It is soooo hot here.  I'm writing this in the shade, waiting out the heat of the day so we can work again in the evening.  Hopefully it will drop below 30oC because we are putting a ceiling on the window seat area and it is very exposed work.  

Saturday 14 January 2012

North wall! Finally! Whoo!

Still life of new wall in setting sun
Yesterday the north wall finally starting taking on some bulk and shape (not to mention a window in a frame - booyah).  

That's the thing about Light Earth; once the details of ordinary building are completed and some dodgy formwork made, the walls grow quickly.  More quickly yesterday, because above waist-height, most walls are only 10cm wide, instead of 25cm.  

It was very interesting watching the inside of the building change in character as it became enclosed.  

The most notable change is the acoustic, which is shaping up to be extraordinary - quiet and clean, but what my old musician buddies call "live".  

There's more done, but we ran out of light and decided to leave some of the formwork on overnight.  And speaking of formwork, it's time for the January 2012 Dodgy Formwork awards!

Dodgy formwork winner
I don't think it's possible for formwork to get any dodgier.  But it did the job. My personal faves are the bit on the corner held on with a clamp, and the bit with the wavy edge.  Why wavy?  It was cut for the shape of the rocks below the window, and we are re-using it here.

Creative special mention
 Why is there a wheelbarrow wheel in the wall cavity?  Watch this space.

Honourable mention for being odd but kinda neat

Thursday 12 January 2012

Patience

Still horizontal and not affixed to any wall
Patience. It's a virtue, apparently.

Two people, three hours and the big northern window is still lazing around on the saw-horses.

Clearly, carpentry is not my forte.  Estimating the amount of time it takes to do carpentry is even less of a forte.  Here's me thinking we'd pick up the replacement glass, pop the window in the wall and get on with some lovely mudding. I mean, we had a huge wooden rectangle frame and two as-yet-unbroken bits of glass.  Join frame A with glass B and get on with it, yes?

The thing is, apparently you need strips of wood around the edge of the window, nailed to the frame to sandwich the glass into the rebate.

This is what three hours looks like
Most people just buy these strips - they're called quad.  But apart from destroying native forest, new hardwood quad would look stupid against the gnarled old second-hand wood of the frame, so we cut these strips from more gnarled old planks.

Then there was measuring, sawing, planing, sanding, oiling, measuring again, sawing again, little beads of silicone, tiny little nails (swinging a hammer less than 1cm from glass!). We're nearly there, but I said that the day before yesterday.

On the bright side, we haven't broken any glass lately.

Wednesday 11 January 2012

Fleshing out the north wall

Hopefully the last time you'll see the circle window through that bit of frame
Today we got our hands back into the mud, building the first new bit of Light Earth wall since August.  It was a relief after a few days messing around with carpentry at a snail's pace to get the mud clothes back on.  

We were out of the habit of making the mud slurry and mixing it into the huge barrow load of straw, so the first batch took ages.  Then ten seconds later, whomp, the huge wall cavity had eaten it all up.  I had kind of forgotten how very thick these walls are.  No wonder it's taken over a year to build them.

Nice fat comforting walls 
Tomorrow we fit the big north window - hopefully without breaking it this time.  We picked up the replacement glass today.  And we will build some more walls.  My foolish optimistic hope is to fit the big window and get all the north wall sections filled up to the height of the window seat by the time we stop to cook dinner for some neighbours tomorrow.

Dodgy formwork!  Ah how I've missed it.

Curvaceous

Tuesday 10 January 2012

They don't make bullet-proof glass like they used to

Oops
We are a bit dispirited this evening.  The window seat is designed around a couple of pieces of very thick glass TJ picked up when the bank he works above upgraded their security windows.  

One of them fell and broke.  They are both non-standard sizes.  We've been able to order a new piece to match, but everything is delayed.  Also, expensive, and basically we've lost a day's progress.

All this time we thought the glass was bullet-proof because it came out of a bank.  We were going to bury it permanently in the walls, on the basis that nothing would break it.  Luckily we know now, so we have changed things so the glass can be removed and replaced. 

Like the flannel-flower windows, we've been storing this ex-bank glass for years.  Since it was "bullet-proof" (it really is very heavy) we haven't been the least careful with it - in fact, there's a piece from the same lot leaning up against the house.  It falls over every now and then, and we prop it back up.  But it had to break the day we wanted to put it in a wall.

Monday 9 January 2012

North wall preparation

North wall skeleton getting busier
Yesterday we turned our attention to the north wall - the one with the window seat, the niches and all the carpentry.  As you can see, it has sprouted a couple of windows and some new bamboo teeth.  We have also mortared in the rocks on the outside and some tiles on the inside to make the damp proof-ish base (last use of cement!  Yessssss!) and made some shelves that will be mudded into place later.

There is more bamboo than usual.  Ordinarily the walls are 25cm thick and monolithic - the light-earth core continues through the gaps in the middle of ladder-trusses, tying everything together.  But above the window seat the walls are thinner, with just a single stud frame.  The bamboo spikes and other sticky-outy things are buried in the wall, so the wall sticks to the frame.

Awwwwww
The red and green windows are very pretty and I'm a little bit immoderately thrilled to see them in place at last. I bought them at a garage sale one day in the '90s.  I had a sudden rush of blood to the head when I saw the Australian native flannel flower design, so I committed the clutter-buster sin of buying a used building product without having a use in mind for it.  In fact, at that stage, I had never built anything at all.  

The windows sat in the shed for years.  I resisted all attempts to give them away.  That sort of attachment to material things should have an unhappy ending, so yesterday when I was hammering the bamboo bits into the frame around them my heart was in my mouth.

Today we will finish framing the big northern windows and fit them into the wall, oil the shelves and sills, do something to protect the pretty stuff from the mud that is coming and cut some custom-sized formwork.  One of my jobs is to make some formwork to shape some wall niches.  So, that will be a new experience.

We hope to start making the light-earth walls later this afternoon.  But we'll see.  I thought we'd get all the carpentry and rock work done yesterday, but when you are amateurs like us, it's "measure twice, cut once, spot obvious thing wrong, scratch head ..." etc.  It's silly things sometimes, like bolting something to the wall and having to pull it off again because you can't swing a hammer for the next thing without hitting it.

Mud floor samples 1 and 2 - fail whale
 The mud floor samples we did the other day have completely failed.  That isn't unexpected, because it's just the first try, but what surprised me is that the second sample (right) has worse cracks than the first one.  The first one has more clay.  So, figure that one out, smarty-pants.

For those keeping score, the first sample had two parts hepburn-soil (clay-rich subsoil from my brother's place) for one part brickies-sand, and the second sample had equal parts hepburn-soil and sand.

Saturday 7 January 2012

Games with sand and colour

Colours from nature
Yesterday was one of those days where the infrastructure fails.  After the second flat tyre and the hole in the wheelbarrow the generator had a hissy-fit that upset the sander, which refused to go again until we plugged it into someone's wall socket (whereupon it coughed up a cloud of dust onto their nice clean house).

During breaks from watching things break, we caught up with some friends so there wasn't time to do anything immediately useful on the mud shed.  Instead we played with some leftover sand from the concrete mix, to see if adding sand to mud and cow manure (instead of adding plant fibre) could make a tough enough surface to walk on, because we want to pour a mud floor, if we can get the right mix.

Mud floor sample No.1
We started with half as much sand as clay-soil, then made a mix with equal parts sand and clay-soil.
Mud floor sample No.2 (showing snail trails from being left overnight in the rain!)
They will take a week or so to dry.  I don't think we've found what we're looking for, but we'll see.

Meanwhile, there was leftover floor sample mix, so I decided to add some iron oxide to see what affect that had on the colour, and spread it out as a patch of render on the South Wall, which I think is now the official experimental wall.
Spreads like creamy frosting
It was so light and fluffy that I had trouble smoothing it out without leaving trowel marks, but it was easy enough to use.  

Shiny
The wet colour is gorgeous, like the colour red-box gum leaves go sometimes, but it has started drying to a dusty pink.  It is also cracking way too much, which doesn't bode very well for the floor samples.

After about three hours of drying - the pale areas are the driest

Friday 6 January 2012

Shifting focus


Welcome visitor
I could spread mud on the walls all day.  It is such a meditative pass-time.  Just me and the wind in the trees and the butterflies that come over for a drink.  

The actions are repetitive, but every moment is slightly different and every section has its challenges, like edges and height. 
One more panel and I'll be half way around the inside of the shed!
It is satisfying to create order out of chaos, by taking a rough lumpy wall and making it smooth.

Some walls are lumpier than others.  The south wall is where I hide the experimental mixes and the first goes at things.  If you come over, don't examine it too closely.  Today I finished the first coat of render and a bit of patching. 

South wall - before
 When that dries, I'm going to have a crack at the second coat of render, just to test the mix and play with colour using oxides.
South wall - after!
Trevor made a neat box for the solar power equipment - the regulator, distributor and so on.  He used a picture frame from the tip and some odd bits of wood.  Now it's there I'm going to have to take some courage and bury a few wires in the walls.
Neato 
He has also made some concrete and poured it into that formwork from the other day. For the next few days we will shift focus from my jobs (mud) to TJ's tasks (carpentry and heavy stuff). Time to get cracking on that north wall and the floor.

Concrete at high tide, waiting for an earthen floor

Wednesday 4 January 2012

Vertical window goodness

Pretty
Yesterday I finished the "parging coat" (first coat) of mud render on the inside of the east wall. I took my time and enjoyed sculpting the curves.  To all the people who gave opinions on whether this window should be vertical or horizontal, you were right: vertical.

Hepburn render mix dries
I'm really pleased with how the new render mix is drying on the walls.  The photo above shows the worst of the cracking - that is, hardly any, especially compared with my first attempt.  The cracks and bumps are small enough to be covered in the next coat of render.  

Shrinkage gap
There is a shrinkage gap at the top of the walls, and it looks ugly where the wall joins the off-cuts of wood that prop up the ceiling, so I decided to take a bit of time yesterday to patch the walls and try (where possible) to cover the wood and bring the mud up to the ceiling.

Ready to start work
When we made the core of the walls, we put in some dodgy formwork to create a sloped window reveal.  It made a really neat surface, but there wasn't going to be enough room for the window to open inwards once I'd put on some thick render. So I had to attack the wall with a hacksaw and scissors.  Again.
Prepared curve
While I was at it I put a few bits of bamboo in at ceiling height above the window reveal.  When the first coat of render dries the ends of those bits will be securely buried, so I'll use them to hold some render upside down in that spot.

Patches on old panels, new panel nearly completed
It wasn't long before I became completely enchanted with the light playing on the curve of the window.  I wish the mud could stay shiny and dark forever. Look at the difference in colour between wet and dry!  I'm definitely going to experiment with some oxides to give the walls some colour.

Sunday 1 January 2012

Formwork and heat

Thrilling, yes?
Today at least we did some building.  Behold, five pieces of formwork.

We achieved that much in the shade before it got too hot to stand, then gave up and drove to Melbourne.  We left Clydesdale mid-morning when it was already 35 degrees inside the house and something really really stupid outside.

The four small boxes are made from laminated chip-board and MDF, which we pulled out of a rubbish skip in Yarraville a few years back.  It used to be someone's kitchen cupboards. Anyone doing mud work should get themselves some of this stuff, because it's easy to cut and join, nothing sticks to it and it's free.

Hippy New Year

Before - shaggy walls adorned only by TJ and his measuring tape
Too tired to type much.  It's 10pm, still over 30 degrees and we spent most of the day building.

East wall interior - 1st batch of mud render
I spent the day rendering the inside of the shed, where even without doors and windows, the mud walls keep the temperature stable.

Curve
It never fails to surprise me the difference render makes to the wall, and how easy it is to make lovely shapes.  I curved the window sill to stop people using it as a shelf for the pleasant aesthetic.

The other great thing about the first coat of render is that it forgives all sins.  The first coat is bulked up with sugar cane mulch so I can use it to fill all the holes and gaps in the wall, and smooth out the shaggy bits at the top where we shoved straw into the wall by hand.

Lunch break
I think this is the last full day of render I will do.  It's tough work, pushing the mix into the wall all day.  I think half days are a better idea if I'm going to last two weeks.

End of day - nearly four panels done