Monday, 10 October 2011

North wall starts to pop out

North wall frame - the big bits are up
Well hello.  Forgot I had a blog for a little while there - sorry.

Not that our progress on the mud shed is anything to write a blog about.  I've been distracted with the important business of being alive in the springtime, and TJ has been distracted by having a job that calls on him to work for six solid weekends, right when he wants to bolt some old bits of timber to the concrete.

But he has made some progress on framing up the north wall.  The main shape of the window seat and its little roof have started to emerge from the main building, with some typically solid joinery.  We haven't even added the bracing and I can already swing from the top-plate without it moving an inch.

Joining two thick wall frames (got enough bolts in that thing?)

Meanwhile, while I'm waiting for the chinese book industry to stop working weekends, I could be getting on with some render, but it's spring, and there are wildflowers, and there's a food garden to plant, and there are native animals living in the fabric of my house!  It's distracting.

If this wasn't a mud shed blog, I could post a hundred photos of local wildflowers.  

Hoary Sunray - Leucochrysum Albicans
Actually I do have a few other building things to show, and I'll write another post soon.  Meanwhile, have an echidna.  


Tuesday, 30 August 2011

A celebration of dodgy formwork

Dodgy west-wall form-work, with dodgy annotations in crayon
This post is a celebration of just how temporary form-work can be when you are working with something as flexible as Light Earth.  I'd like to see the sort of engineering you'd need to do these awkward bits of wall in rammed earth!

The photo above shows bits of wall that have frames made of wood or metal that we didn't want to damage with screw-holes, because we're not going to render over them.  When I shoved the straw-mud mix in the column on the left, TJ held the laminex boards in place with his hands.  Then we tied it on with bailing twine for an hour while it dried.  Yes, bailing-twine.  Is there anything it can't do?


New!  Sliding formwork technique!
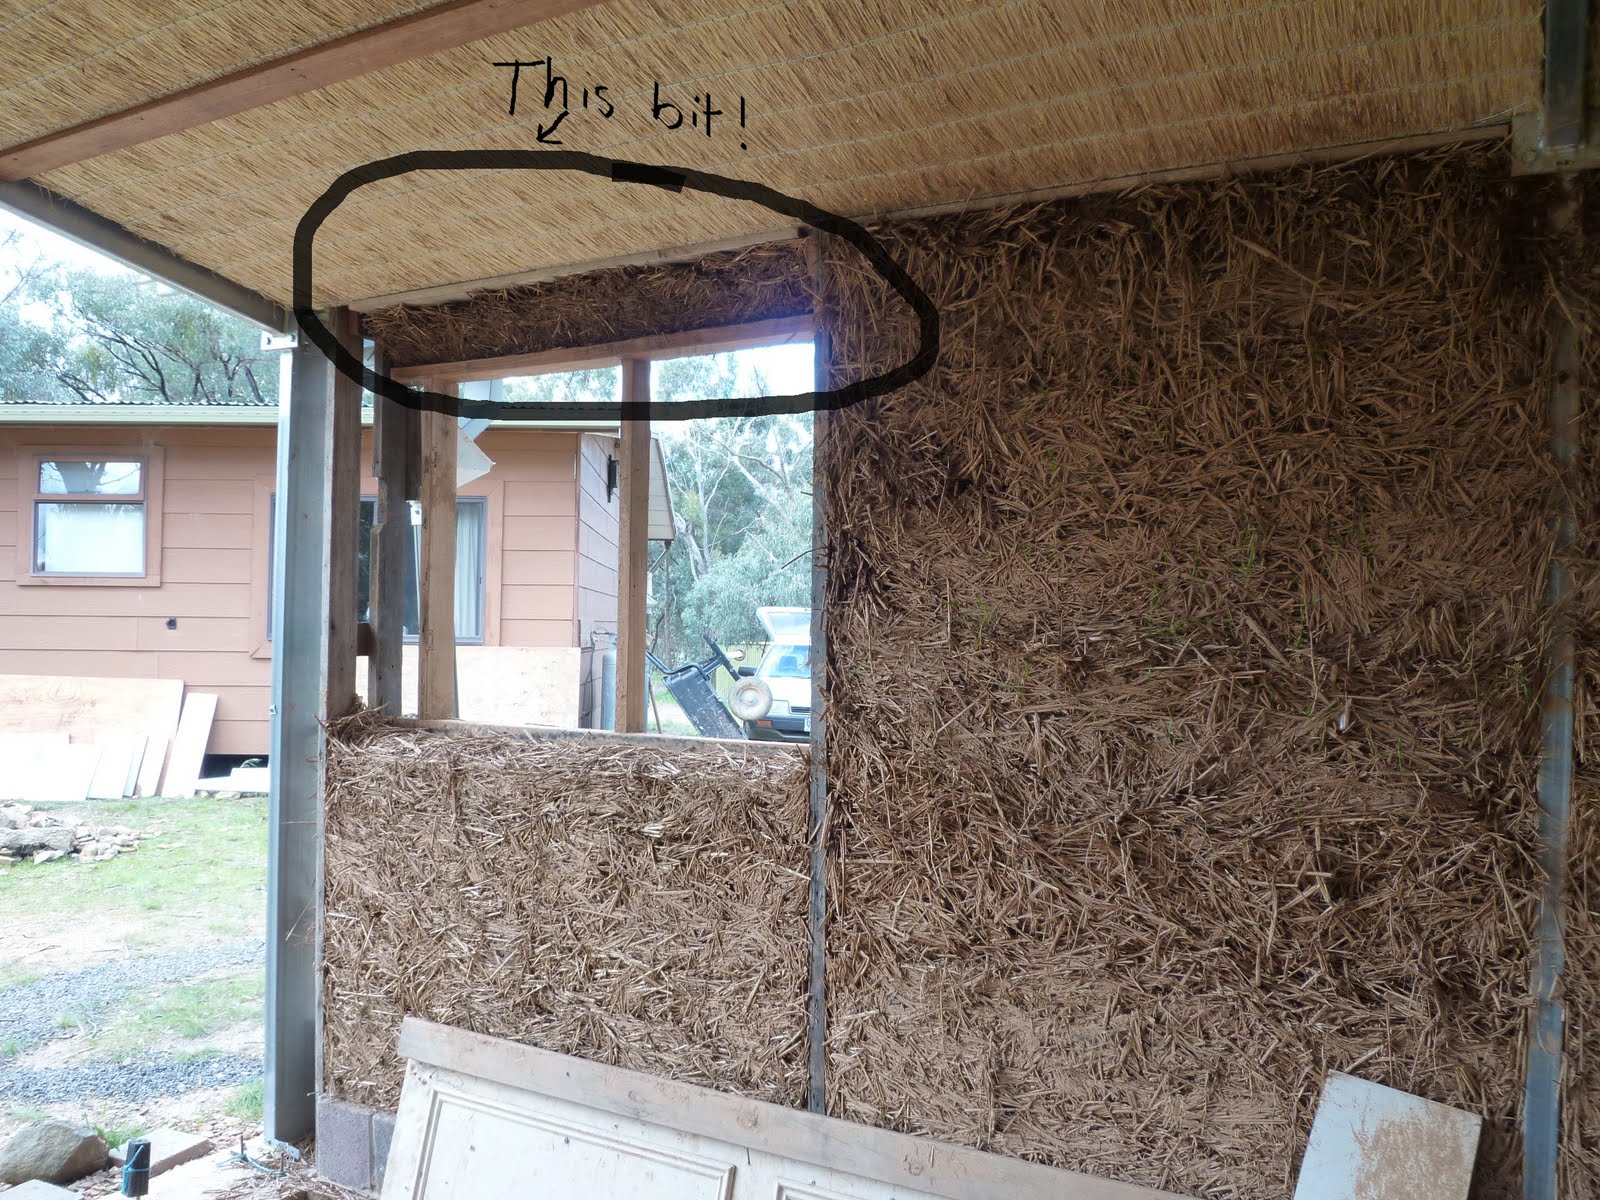
This is a new technique I developed last weekend.  I wish I'd figured this out before I did the tops of all those other wall panels!  There's always a gap at the top of every wall that you have to fill with mud free-hand, because you can't put formwork all the way to the top (think about it). Usually I shove mud into the gap and try to smooth it down with a pastering tool called a float.  It always looks awful, and I disguise it with render later.

This time, I used the float as a bit of hand-held formwork.  As you can see from the very elegant hand-modelling above, I held it in place with one hand, and with the other hand I shoved handfuls of straw in the side.  Then slide it along and continue.  It's the neatest bit of gap filling I've ever done.  Hurt my left arm a lot, though.  Ow, ow ow ow ow.  Ow.

Since it's such a neato new thing, here's another photo showing the sliding formwork technique.


That photo also shows a dodgy wedge-shaped bit of formwork above a window.  We hammered lots of bamboo into the wall to hold the mud in place, but even we were surprised when we took away the formwork and the mud continued to defy gravity!


The tall window in the west wall needed a deep, slightly sloping window surround. The picture below shows how we mocked up the formwork with some old laminex door bits, cut to size and screwed in place against the front panel of formwork..

Window surround formwork

There is a flat piece of ply on the back, covering the whole area.  You shove mud-straw mix in the top, try not to get the ceiling dirty and hope for the best (we did the gap at the top before I developed the sliding formwork technique, above).


Gable, showing repairs and preparation

TJ made two pieces of formwork for the gable. They are only held in at the bottom, leaving a gap at the top to shove straw into.  The photo shows a few pieces of bamboo in place for the next half, but we wedged lots more bamboo into the gap between the ceiling and the frame.  The walls will dry around the bamboo pieces, tying the wall to the frame.  When this half of the gable had dried for an hour, we removed the formwork and flipped it around to do the other side.

And finally, here, have a couple of sugar-gliders in a nesting-box.

Adorable.


Our nest-building really is pretty amateurish compared to theirs. They gather the grey-box leaves in their tails, and bring them into the nest via that little hole you can see in the bottom of the box behind the baffle (the box usually has a lid on the top).


In a few days we will be going to Clydesdale for a whole week!  I can't wait to get started on that north wall.


Monday, 29 August 2011

Three walls done! Whoo!

Three walls!  Whoo!
We have reached the three-wall* milestone in the mud shed, thanks to the hard work of visiting buddy GW.  It looks like a very large doll's house, with the front wall missing!

This blog post is pretty well just a report on what we finished off last weekend. We did all the difficult bits we had left until later- the gaps that needed filling, the awkward spaces, the awkward window surround. I'll try and do another post on  how we achieved it, which will probably be called something like "a celebration of dodgy formwork".

East wall done!*
We finished* the East Wall, including the area around the tall thin window, some gaps in the middle panel and the awkward area on top of the big window.  You can't see it because it's in shadow.  But it's there.  We finished at dusk on Saturday. By mid-morning Sunday some blazing winter sunshine had started drying the wall - you can't even see the border of the new material.

View from tall window
This is the view from the inside of the East Wall, looking out.  At least, that's how it looks if you stand in just the right spot to avoid seeing the Termite Shed.  The very elegant tree is a Grey-Box.

The gable - done!
On Sunday we filled in the gable above the South Wall (the triangle above the two main panels).  I miss the view of the tree-tops through the gap.  But in compensation, we have a lovely view through the circular window, which I finally got around to trimming a bit.
Circle window - Long-leaf box
The tree you can see through the window is a Long-leaf Box, a type of rough-barked eucalypt (gum tree) with very blue-grey leaves and a habit of growing in a quirky twisted form.  The branch through the window shows both the plump round juvenile leaves and the long slender adult leaves.

Gemini Corner
The incredible GW also completed* the corner that joins the East Wall to the South Wall, and did a neat job of it, too.  I have named it after her, honouring our "you built it, you own it" policy.

West Wall
We even filled all the gaps** in the West Wall - the gap above the window, and the column next to it.  It's really neat up there above the window - I'll tell you the new technique next time.

* Yeah, when I say "finished" I'm not counting render. This means I get to "finish" each wall four times. Once when the light earth is in place, once each for two coats of render and once for mud-paint.  More champagne!

** Just now, looking at this photo, I noticed there is still a gap above the sodding door.  How did I not notice this yesterday?


Tuesday, 23 August 2011

Planning, with orchids and wildlife on the side

North Wall drawings
We haven't been able to build for a month, because whenever the sun has shone poor TJ had to work weekends, and when he was free it was rainy.  We'll start building again this weekend, but meanwhile we've spent some time planning the north wall.

The plans we submitted to council just had a drawing of a window seat popping out, a little roof, and a few basic notes, like that we'd frame it up in 'seasoned hardwood'.*  Now we've got to figure out how to do it!

The window seat is all corners, all angles, all complicated.  The walls will be 30cm thick below the seat then 15cm thick above. There's a seat to sit on and a ledge to lean on. There are windows to frame up, a little ceiling to hang and a roof on the top. Everything has to take a lot of knocking around without moving.  I can't say we've got all the answers yet.


Corner stud framing dummy-run

We did a dummy-run of a corner framing stud with a few off-cuts, just to see in 3D what we were planning.  I plonked it down in place, and was pretty chuffed to find the pieces of reo bar that I cemented into the footings the day they were poured line up exactly with the model of the stud pieces.

All we have to do is drill a hole in the bottom of each framing piece and lower it into position, and the base of the wall will never, ever move laterally again.  Neat, eh?

While TJ's been away, I've been wandering around, checking on the plants and some of the wildlife.

The Mammal Survey Group from the Vic National Parks Association came up to check the nesting boxes on some adjacent properties (we can do ours ourselves).  We found some incredible Tuan and Sugar Glider nests, and a few inhabitants.

Sugar Gliders all snuggled up
The first orchids have started flowering - Nodding Greenhoods.


They always remind me of a protest march, or maybe that John Brack painting.  I really love them.  I kind of like their attitude - faces down, no glitz, entrap the odd gnat then back to hibernation before the devil sees them coming.

* Council wants everything framed in "seasoned hardwood".  We're not buying any old growth forest timber, so we scrounge wood from rubbish skips in Melbourne.  Some of the wood in this building has been seasoned since the 1930s!  I still need quite a few long pieces, so I take a different route to work each day and look down the back streets for renovations.  If we can find the builders we ask and they sometimes set some good wood aside, but mostly we just pull it out of skips before they get taken to the rubbish tip.  It really is criminal what we waste.


Sunday, 24 July 2011

Mid-winter mud-fest


Dress code: clothes you don't want any more
We were joined by some friends from Melbourne for a mid-winter mud-fest.  It was ten degrees today, and sort of damp so it should have been miserable but it was pretty fabulous instead.  

It's good to be outside in the fresh air making things, especially when you know there's a wood fire and a hot meal waiting inside.  You get warm mixing the mud in with the straw, and lifting it up into the wall.  It's also good to have company.  

Coating loose straw with a mud slurry
Window update

After all that soul-searching we decided to go with a vertical window.  It's less practical and harder to make, but TJ was willing to spend all of Saturday framing it up.  Once I saw it in place, I got the point. 

Vertical window and Grey Box tree
We tied the window into the frame of the shed by bolting the top into the top-plate, and bolting the bottom to a horizontal four-be-two attached to two studs.  This is buried in the mud, so you'll just have to take my word for it.

We drilled holes up each side of the window frame and banged bits of bamboo, as you can see below. They will act as anchors in the mud wall.
Raili (working, with hammer); Sean (mugging, with dangerous power tool)
We got nearly as much wall built today working together as TJ and I would have made in two days on our own. All the darker bits in the picture below were built today.


You may notice we re-built part of the centre panel that we made a month ago.  That day I decided on whim to see what would happen if I didn't tamp the mix down as hard.  Theoretically, the less you tamp down the mud-straw mix, the faster the wall goes up, the better the insulation (air gaps), plus I thought it might dry a bit faster if it was less dense.  It was worth a try, but it didn't work out.  The wall felt weak and fragile, and I want a nice solid wall.  We can soak the mud off the straw, use the mud again and compost the straw, so there's no waste.

By the time we knocked off work today, it was raining pretty solidly.  We got 9mm of rain over night and while we were building.  There's going to be rain or showers on five days out of the next week.  I'm starting to worry about all these damp walls drying so slowly.  Bit late for that, probably.

Monday, 18 July 2011

Rain stops play, but this place will live forever

Verity
Winter has recently included a quantity of freezing drizzly rain.  So there's been nothing to do but sit inside by the wood fire and go bush walking with awesome visiting kids who don't give a fig about cold, night falling or punctual meals.

It's going to rain on and off all week and next weekend, which is a bit depressing.  We have two completely free days and a couple of volunteers offering to come and help next weekend.  I'm worried I'll going to spend two days making them hot cocoa and feeding the fire instead of getting muddy.

For the sake of any Canadians reading this, can I say it was MINUS THREE DEGREES last weekend. You're impressed, aren't you?  That's cold enough for ice to form in the bird bath. Sure, that was at dawn and I was asleep, but still.  MINUS THREE, MAN.

Yesterday we went to a celebration for the 1000th property in Victoria to be protected forever by a Trust for Nature conservation covenant.  We are one of those thousand.  Here, have a Sugar Glider.


It's great being in a room full of people, and you don't know most of them, but you know you can walk up and talk to anyone and they'll be a kindred spirit.  Also, it was at a winery, and Lindy Lumsden brought along her pet microbat, and fed it meal-worms.

A conservation covenant is a voluntary agreement between the landholder and the state government, which creates binding alteration to the land title, and is annexed to the planning legislation.  The allowable land use is altered forever to prevent land clearing and other negative uses, and promote positive action like restoration and weed prevention.  Trust for Nature brokers the covenants and performs a number of other useful functions.

The great thing is that the present Prime Minister is getting ready to pass climate change legislation that will actually pay landholders to preserve natural areas in this way, because permanent biodiverse reserves are an efficient way to promote soil carbon and prevent dangerous climate change, so hopefully one day we will have a landscape full of reserves across the country, connecting private and public reserves.

To celebrate the 1000th covenant, Trust for Nature has done number of endearing things, including making this video (nb the animals start moving at about 1.39).


If it ever stops being cold and rainy, normal blogular service will resume.

Tuesday, 5 July 2011

Window options - help us decide!

TJ prepares to frame the new window
It was too rainy last weekend to play with the mud.  So we went to the Daylesford Tip Shop and bought  a piece of glass for a new window.  It cost a buck.  It needs framing, which is TJ's job, and we have to decide where to put it, which is where you come in.

Here are our options, set out in picture form, using my mad photo editing skillz.


This window will go on a part of the building we would prefer to keep dark - that's why all the windows are down the other end of the building. An internal wall will partially divide the building, creating the dark corner we want, but it will also prevent air from the other windows from circulating in that part of the building. Temperatures here can get over 45 celsius (113 fahrenheit) and often go over 40 celsius (104 F), so we need a window for ventilation. We're a bit worried that the  building is so well insulated that if it gets hot, it will stay hot unless we can get the heat out at night.

The two options for this long, thin window are: horizontal and vertical.

Horizontal, hinged at the top


Advantages: This is the easiest option to build.  We could attach the window frame to the wooden top-plate, and hang the window with hinges at the top, opening inwards.  The wall isn't so high - we'd just have to step up on something to open it.

Since the window would be tucked up under the eaves, it would be well shaded and protected from the weather, so we wouldn't need a proper window sill or flashing.

Hot air rises, so a horizontal window at that point would be the most efficient way to get rid of heat.

Disadvantages:  What's the point of a window that looks out onto the underneath of eaves?

In order to reach the window easily, we'd have to hang it on the inside edge of the 25cm thick wall.  All the other windows will be flush with the outside edge of the wall, with a lovely wide window sill on the inside.

I'm fairly certain that a wide sill made of mud in that location will become a nesting spot for swallows.  Which would prevent us opening the window, and will look messy with streaks of guano below the nest (not that I care, I love swallows).


Vertical window, hinged at the side


Advantages: A vertical window in this spot would give a perfectly framed glimpse of a lovely clump of trees, and help make up for the other east wall and north wall windows, which will look out onto the house, another run-down shed and the car park.

It would be easier to open, since it would be lower on the wall. And the top of the window would be high on the wall to help expel some hot air.  A window sill it would be the perfect spot to use an odd-shaped bit of wood our friend Lizzie B inherited recently, and wanted us to use to build something. And TJ likes the look of long vertical windows.

Disadvantages: Harder to build.  It would be exposed to the weather, so we would need to frame it up with a proper external window sill at the bottom to direct the rain away from the mud wall.  We'd need to take greater care making the frame braced and square.

The sun would come in.  In summer the sun scoots up to the north early in the day, so a narrow window won't be a very serious problem, and it wouldn't be the only thing letting in heat, but it nevertheless would add to the heat and light burden.  We'd need to create some sort of shade.

Summary / question for you


Do we value beauty or practicality in this window?